
How to Make a Bullet Point on Google Slides (Step-by-Step Guide for Beginners)
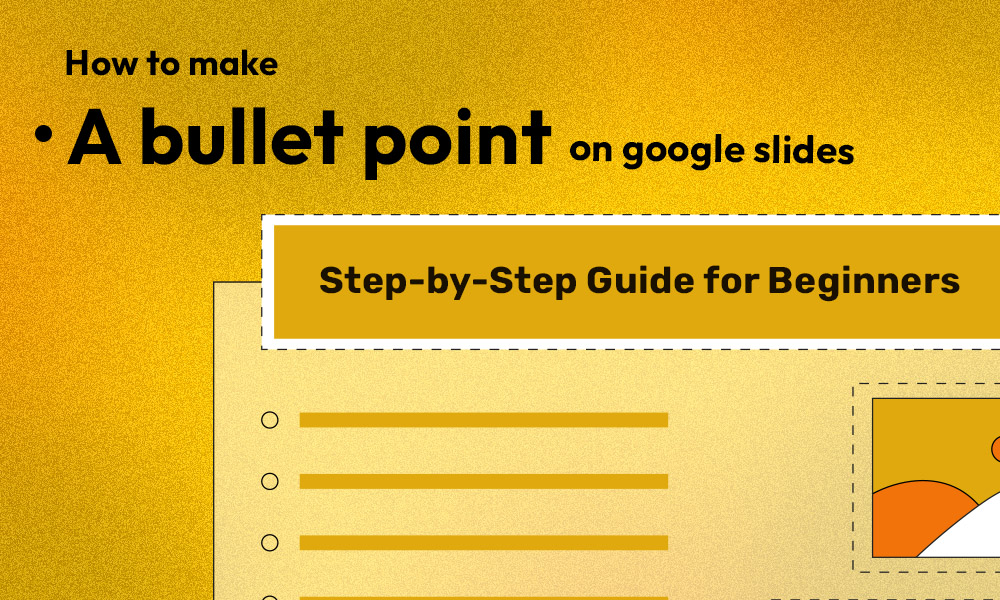
If you’re searching for how to make a bullet point on Google Slides, you’re likely trying to organize your presentation in a clearer and more professional way. Bullet points are essential for structuring information, improving readability, and keeping your audience focused. Instead of overwhelming viewers with long paragraphs, bullet points allow you to highlight key ideas quickly and effectively.
Below is a complete beginner-friendly guide with clear subheadings to help you understand everything step by step.
Why Bullet Points Are Important in Presentations
Bullet points make slides easier to read and understand. They help break down complex ideas into smaller sections, making it easier for your audience to follow along. When used correctly, bullet points improve clarity, maintain visual balance, and make your slides look organized and professional. Rather than writing large blocks of text, bullet points encourage you to summarize your message in concise phrases.
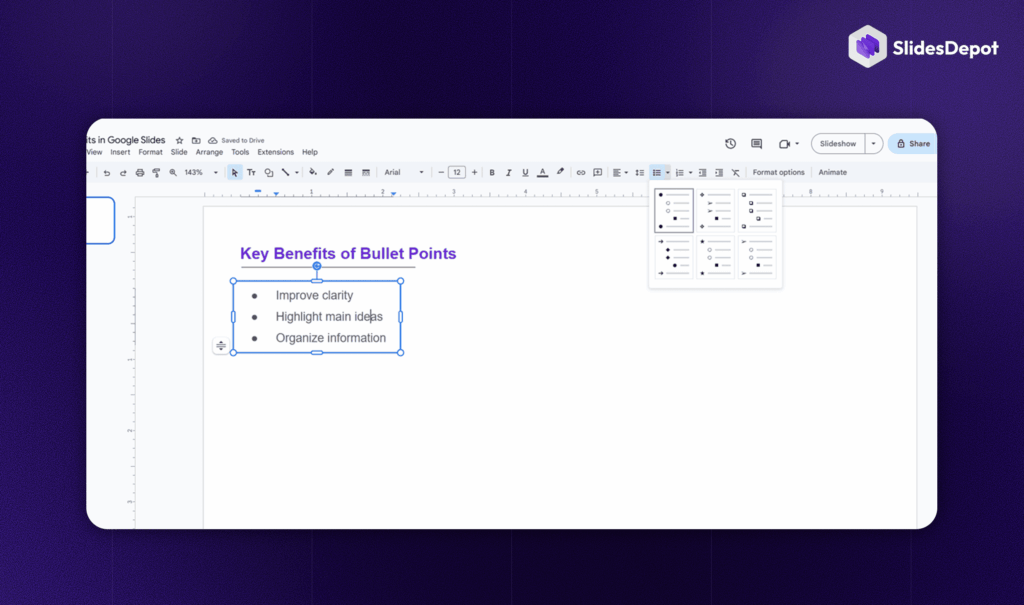
Method 1: Add Bullet Points Using the Toolbar
The easiest way to add bullet points in Google Slides is by using the toolbar.
First, open your presentation and navigate to the slide where you want to add bullet points. Click inside an existing text box. If your slide does not already have a text box, click on “Insert” in the top menu and choose “Text box,” then draw it onto your slide.
Once your cursor is active inside the text box, locate the bulleted list icon in the top toolbar. It looks like three small dots followed by horizontal lines. Click that icon, and Google Slides will activate bullet formatting. You can now type your first point. Each time you press Enter, a new bullet point will automatically appear.
This method is simple and works perfectly for beginners.
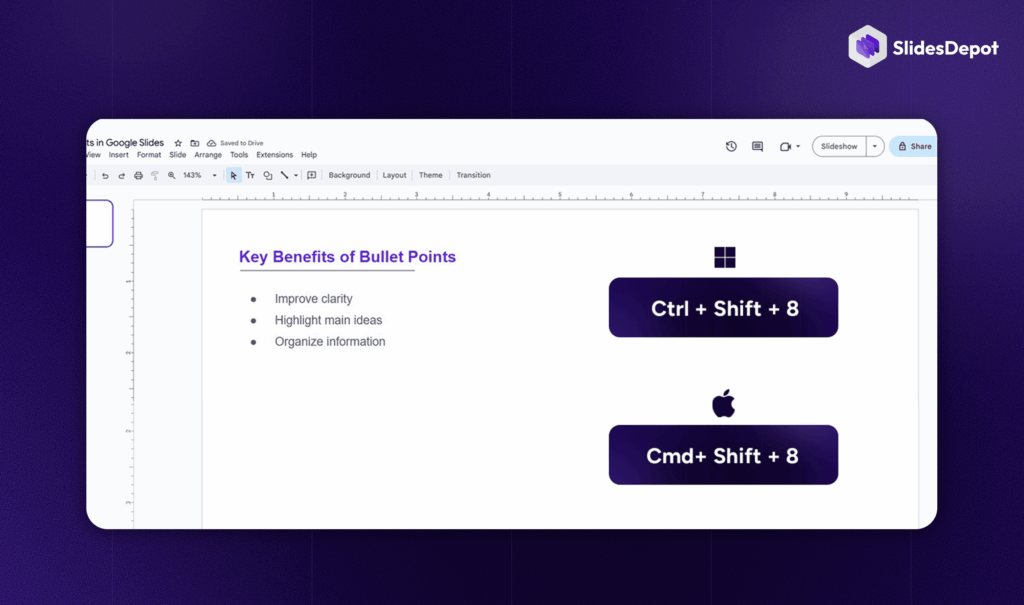
Method 2: Use Keyboard Shortcuts for Faster Formatting
If you want to work more efficiently, keyboard shortcuts are a great option.
On Windows, press Ctrl + Shift + 8 while your cursor is inside a text box.
On Mac, press Command + Shift + 8.
This instantly turns your text into a bulleted list without clicking the toolbar. Shortcuts are especially useful when creating longer presentations or when you need to format slides quickly.
How to Add Sub-Bullet Points (Nested Lists)
Sometimes you need to organize supporting details under a main point. This is where sub-bullets come in handy.
After creating a bullet point, press the Tab key to move the text into a sub-level. The bullet will shift slightly to the right, indicating it is now a sub-bullet. If you want to return to the main level, press Shift + Tab. You can also use the Increase Indent and Decrease Indent buttons in the toolbar to adjust levels manually.
Sub-bullets help create a clear hierarchy, making your slides easier to understand and visually structured.
How to Customize Bullet Points
Google Slides allows you to customize bullet styles to match your presentation theme.
To change the bullet style, highlight your list and click the small dropdown arrow next to the bullet icon. You’ll see options like different shapes or the ability to switch to numbered lists. This is helpful when you want to present step-by-step information instead of general points.
You can also change the bullet color by selecting your text and choosing a new color from the Text color option in the toolbar. The bullet color automatically matches the text color, helping you maintain design consistency. Additionally, adjusting line spacing can make your slide look less crowded. Select your text, click the Line spacing option, and choose spacing that improves readability.
Best Practices for Using Bullet Points Effectively
Knowing how to make a bullet point on Google Slides is important, but using them effectively makes your presentation stronger.
Keep your bullet points short and clear instead of writing full sentences. Slides are meant to support your speech, not replace it. Many presenters follow the “5×5 rule,” which suggests using no more than five bullet points per slide and no more than five words per bullet. This prevents overcrowding and keeps your slides visually balanced.
Consistency is also key. Use the same bullet style, font size, and spacing throughout your presentation to maintain a professional look. Avoid using too many nested levels, as this can make your slides look cluttered.
Use Ready-Made Templates to Improve Your Slides Faster
While learning how to format bullet points is important, using professionally designed templates can instantly upgrade the overall look of your presentation. A well-structured template already includes balanced spacing, clean typography, and properly aligned bullet sections saving you time and effort.
If you want to skip the design struggle and focus only on your content, you can explore our presentation template collections to find modern, fully customizable Google Slides templates for business, education, and creative projects. These templates are built to maintain visual consistency, making your bullet points look clean and professional without extra formatting work.
Using the right template alongside proper bullet formatting ensures your slides look polished, organized, and engaging from start to finish.
Final Thoughts
Learning how to make a bullet point on Google Slides is a simple but powerful skill. Whether you use the toolbar method or keyboard shortcuts, adding bullet points takes just a few seconds. By organizing your content with clear structure, concise text, and consistent formatting, you can create presentations that are both professional and engaging.
Start applying these steps in your next presentation, and you’ll immediately notice how much cleaner and more effective your slides look.

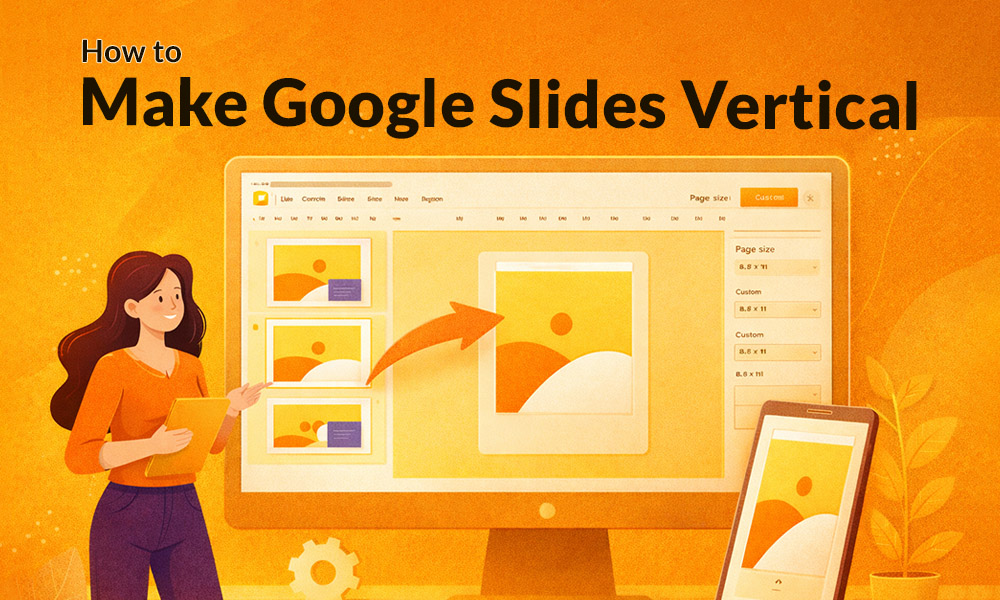
How to Make Google Slides Vertical (Portrait Mode) – Step-by-Step Guide
Google Slides is one of the most popular presentation tools in the world, but it has one quirk that trips up a lot of users: it defaults to landscape (horizontal) mode. If you’ve ever tried to create a poster, resume, infographic, social media graphic, or flyer in Google Slides and felt frustrated by the horizontal layout, you’re not alone. The…

What Is the Purpose of Brainstorming During the Development of an Action Plan? 5 Strategic Benefits Explained
Every great result starts long before the first task is assigned or the first deadline is set. It begins with a single question, a blank whiteboard, and a team willing to voice ideas freely that’s where real planning starts: with brainstorming. Yet many teams skip this step, eager to jump straight into execution. That rush almost always costs them later. So,…
What Is a Product Roadmap? SlidesDepot’s Complete Visual Guide
Building a great product is never accidental. Behind every successful launch, every well-timed feature release, and every aligned team is a document that holds the strategy together. That document is a product roadmap and understanding how to build and present one is one of the most valuable skills a product professional can develop. A product…