
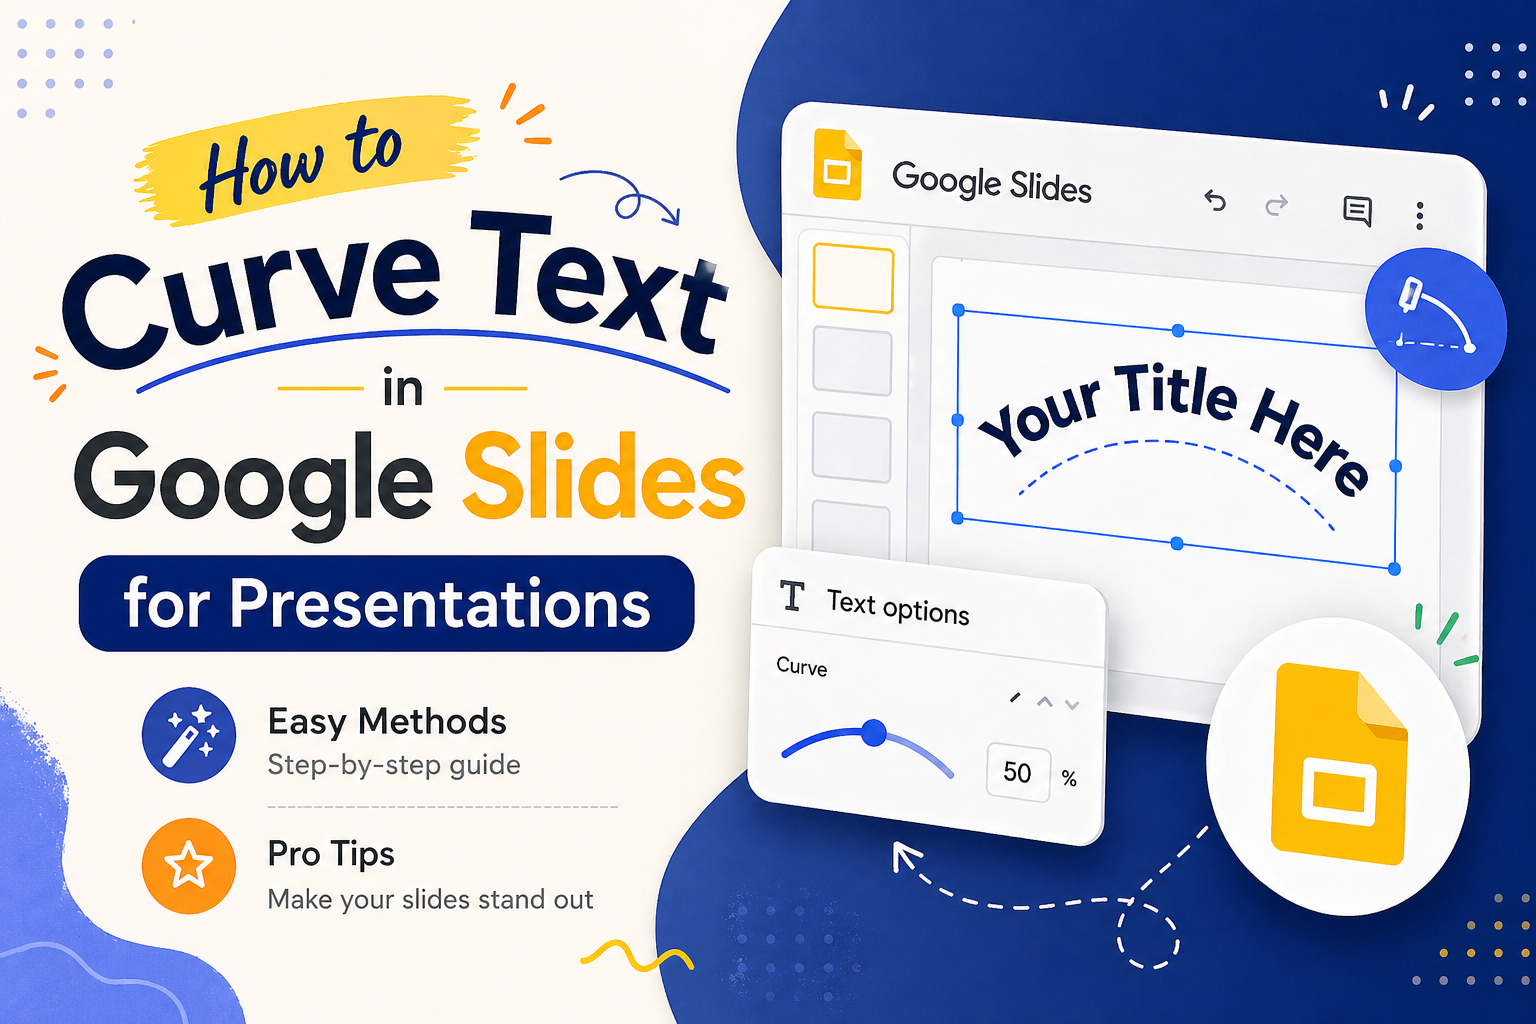
How to Curve Text in Google Slides for Presentations (Easy Methods + Pro Tips)
Presentation design is often about finding the right balance between information and visual flair. While Google Slides is a powerhouse for collaboration, it lacks a native, one-click curve text button. This leaves many presenters frustrated, especially when they want to wrap text around a circular logo, style a badge graphic, or add an elegant arc to a title slide. Learning how to curve text in Google Slides is one of the most searched formatting questions among marketers, educators, and business professionals alike.
SlidesDepot’s team of designers builds hand-crafted presentation templates for exactly these situations, so you spend less time wrestling with formatting tools and more time delivering a message that lands.
Why Google Slides Does Not Have a Native Curve Text Button
Google Slides is built for the browser. Speed, stability, and real-time collaboration are its core strengths, and keeping the platform lightweight is part of what makes those things possible. Some of the more complex formatting tools available in desktop software, like text-on-a-path, simply did not make the cut.
That does not mean you are out of options. Presenters and designers have developed reliable workarounds that produce clean, professional results. The three methods below cover everything from a quick tilt to a mathematically precise circular wrap. Choose the one that fits your situation.
Method 1 — The PowerPoint Bridge (Best for Precision)
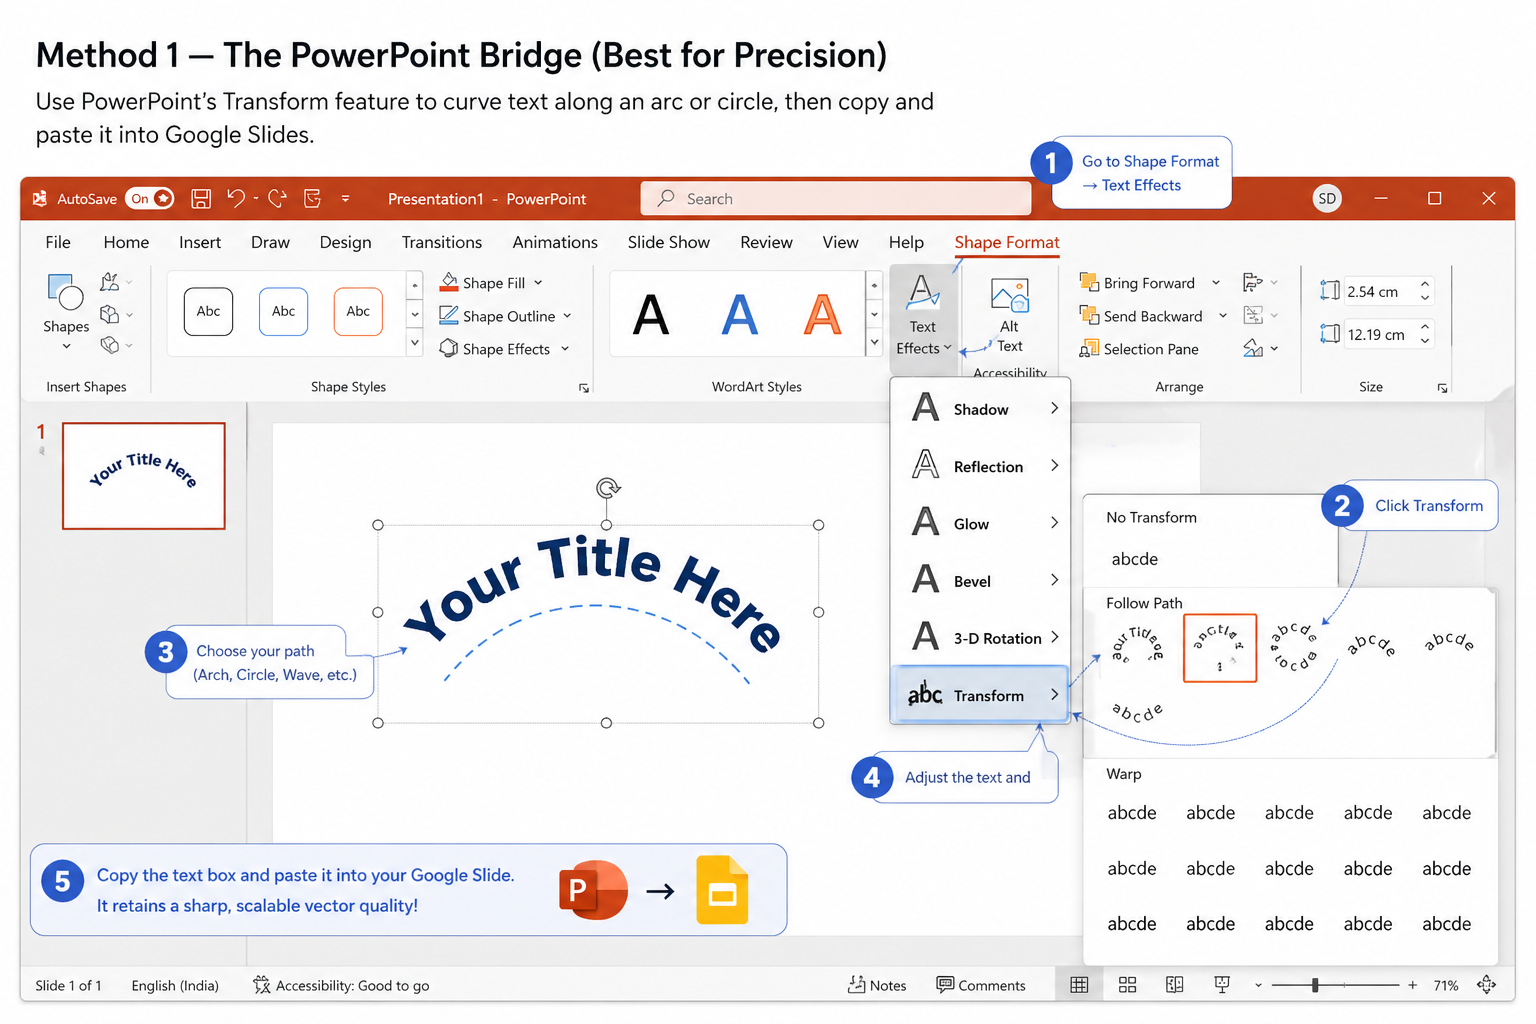
This is the method most design professionals reach for when quality matters. PowerPoint includes a dedicated Transform feature that lets you place text along any curved path, including arc, circle, and wave options. Once styled, the element pastes directly into Google Slides as a vector object, which means it scales without pixelation and holds its shape perfectly.
Step by step
- Open Microsoft PowerPoint and create a text box with your content.
- Select the text box and go to Shape Format, then Text Effects, then Transform.
- Choose your preferred path such as arch, circle, or wave.
- Adjust the angle and size to match your slide layout.
- Copy the text box and paste it directly into your Google Slide.
The curved text arrives as a clean vector graphic. Resize it freely and it will stay sharp on any display, including large projector screens and high-resolution monitors.
SlidesDepot templates are built to work on both PowerPoint and Google Slides without any conversion steps, which makes this workflow straightforward if you regularly move between the two platforms.
Method 2 — The WordArt Workaround (Best for Staying in Google)

If you do not have access to PowerPoint or prefer to work entirely within the Google ecosystem, WordArt is the closest native option available in Google Slides. It does not offer a true curve-on-a-path feature, but it gives you enough flexibility for title slides and simple angle effects.
Step by step
- In Google Slides, click Insert and then WordArt.
- Type your phrase and press Enter.
- Drag the middle handles inward to skew the text shape.
- Use the rotation handle at the top to tilt the text to the angle you need.
WordArt works well for short phrases on a title slide where you want a stylised visual angle rather than a precise arc. Where it falls short is anything circular. For that, Method 1 or Method 3 will serve you better.
Pro tip
If your goal is a circular diagram with text labels, such as a process cycle, Venn diagram, or radial flowchart, the fastest route is often a pre-designed template. SlidesDepot’s single infographic slide library includes circular layout templates where the text alignment is already handled by a professional designer. You download it, replace the placeholder text, and the layout holds without any manual adjustments.
Method 3 — Third-Party Tools for a Perfect Circular Wrap
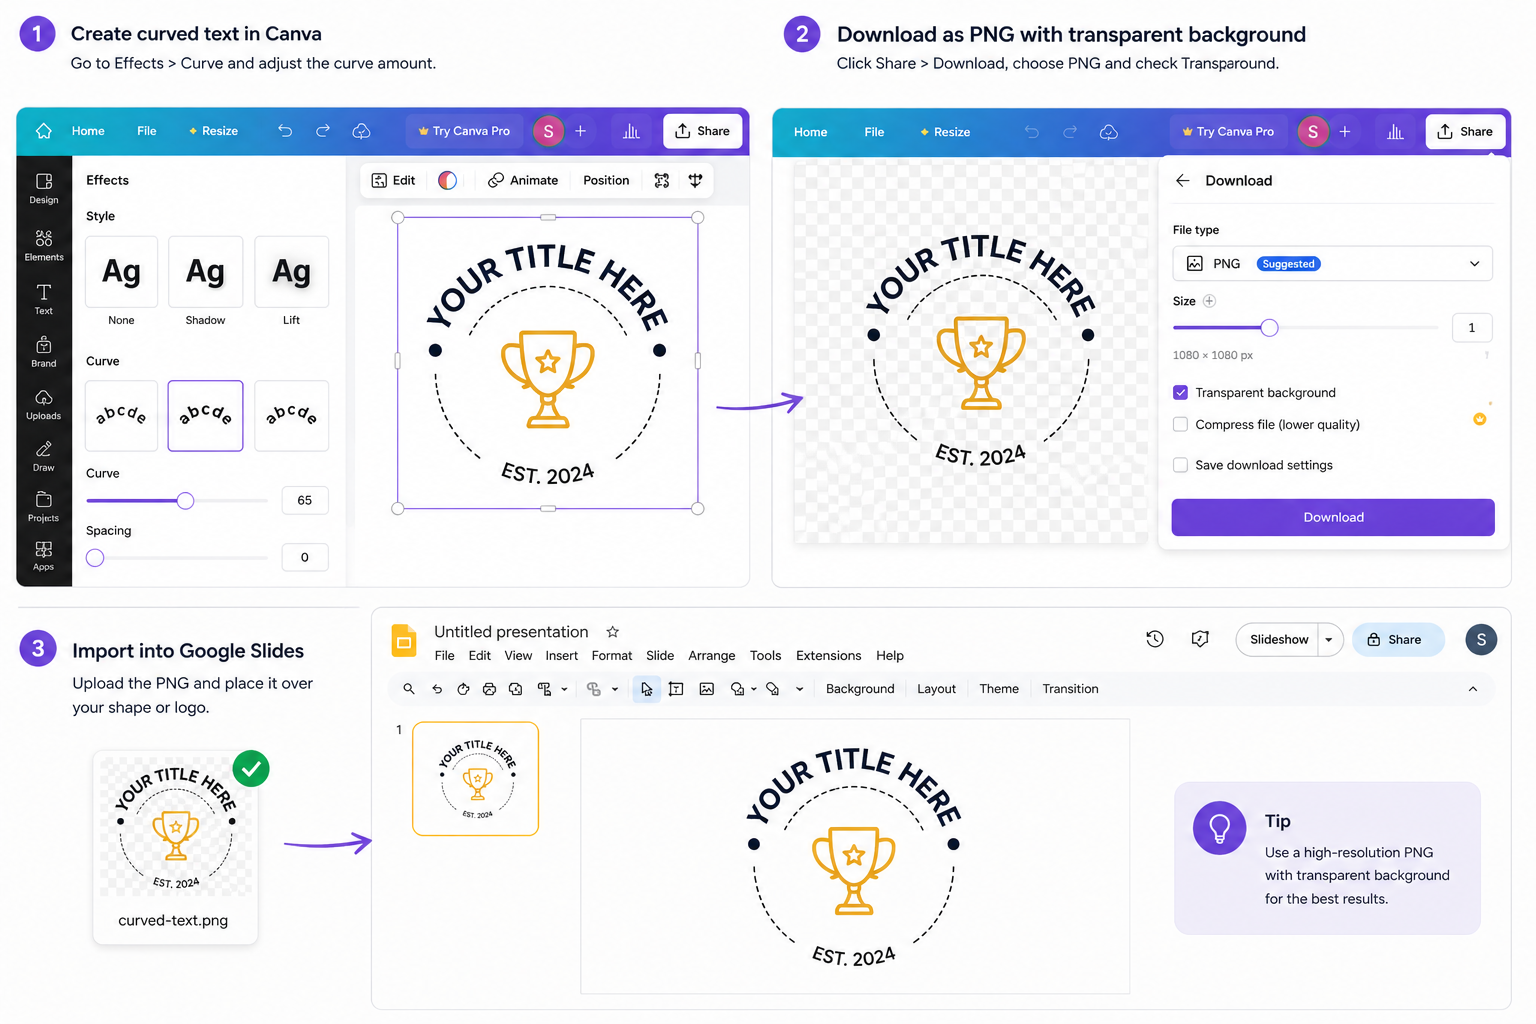
For text that needs to follow a true circular path, such as a stamp, seal, or badge, the most reliable approach is to generate the asset in an external tool, export it as a transparent PNG, and import it into your Google Slide as an image.
Troygram
Troygram is a free, browser-based tool built specifically for curving text. You type your phrase, set the radius and direction of the curve, and download the result as a transparent PNG. Upload it to Google Slides, position it over your shape or logo, and the result is clean without needing any design experience.
Canva
Canva’s Effects panel includes a curve text option with control over arc intensity, font styling, colour, and spacing. Export your design as a transparent PNG on the free plan and import it into Slides. Canva is particularly useful if you are already using it for other brand assets, since you can keep your fonts and colours consistent across everything.
A note on export quality
Always export at the highest resolution available and use PNG format with a transparent background rather than JPEG, which adds a white fill. Once imported into Google Slides, the image will sit cleanly over any background colour or design element on your slide.
When to Use Curved Text and When to Leave It Out
Curved text draws the eye. That is its strength and its risk. Use it sparingly and it signals something important. Use it too often and it becomes visual noise that competes with everything else on the slide.
Use curved text for
- Wrapping a brand name or label around a circular logo or icon
- Adding text along the outer edge of a process cycle or roadmap diagram
- Creating stamp, seal, or badge style graphics for business presentations
- Styling a hero title on an opening slide where design impact matters
Avoid curved text for
- Body paragraphs and multi-sentence text, as readability drops sharply beyond a short phrase
- Data-heavy slides such as dashboards, financial reports, or comparison tables where straight text keeps the focus on the information
- Slides that already have multiple competing visual elements where a curve adds complexity rather than clarity
The guiding principle is simple: if the curve makes the text harder to read, the design choice is working against you.
Pro Tips for Working With Curved Text in Google Slides
Group your objects. Once curved text is positioned over a shape or image, select both and press Ctrl+Alt+G on Windows or Cmd+Option+G on Mac. This locks the elements together so the layout does not shift when you move other items on the slide.
Use the Format Options sidebar for precision. Right-click any text element and select Format options. The panel lets you set exact dimensions, rotation angle, and shadow properties with numerical inputs, which is far more reliable than adjusting by eye.
Always check mobile view. Tight circular curves can render differently on tablets and phones than on a desktop screen. Before presenting, preview the slide on a smaller device to confirm the layout holds.
Keep your arc gentle. The tighter the curve, the harder the text becomes to read. A wide, gentle arc works for most slide designs. Reserve tight circular text for short words, ideally no longer than three or four syllables.
Final Thoughts on Curving Text in Google Slides
Knowing how to curve text in Google Slides gives you a useful design option, but it works best when used with intention. A well-placed arc on a title slide or circular diagram adds visual personality. Applied to the wrong content, it gets in the way of clear communication.
For times when building slide layouts from scratch is slowing you down, SlidesDepot offers a library of designer-crafted templates covering single infographic slides and full presentation decks. All templates work on both PowerPoint and Google Slides with no conversion needed, and a free plan is available with 10 downloads per month. The library is updated weekly, so the designs stay current.
The methods in this guide will handle most curved text situations you will run into. Start with the approach that fits your tools and your timeline, and adjust from there.

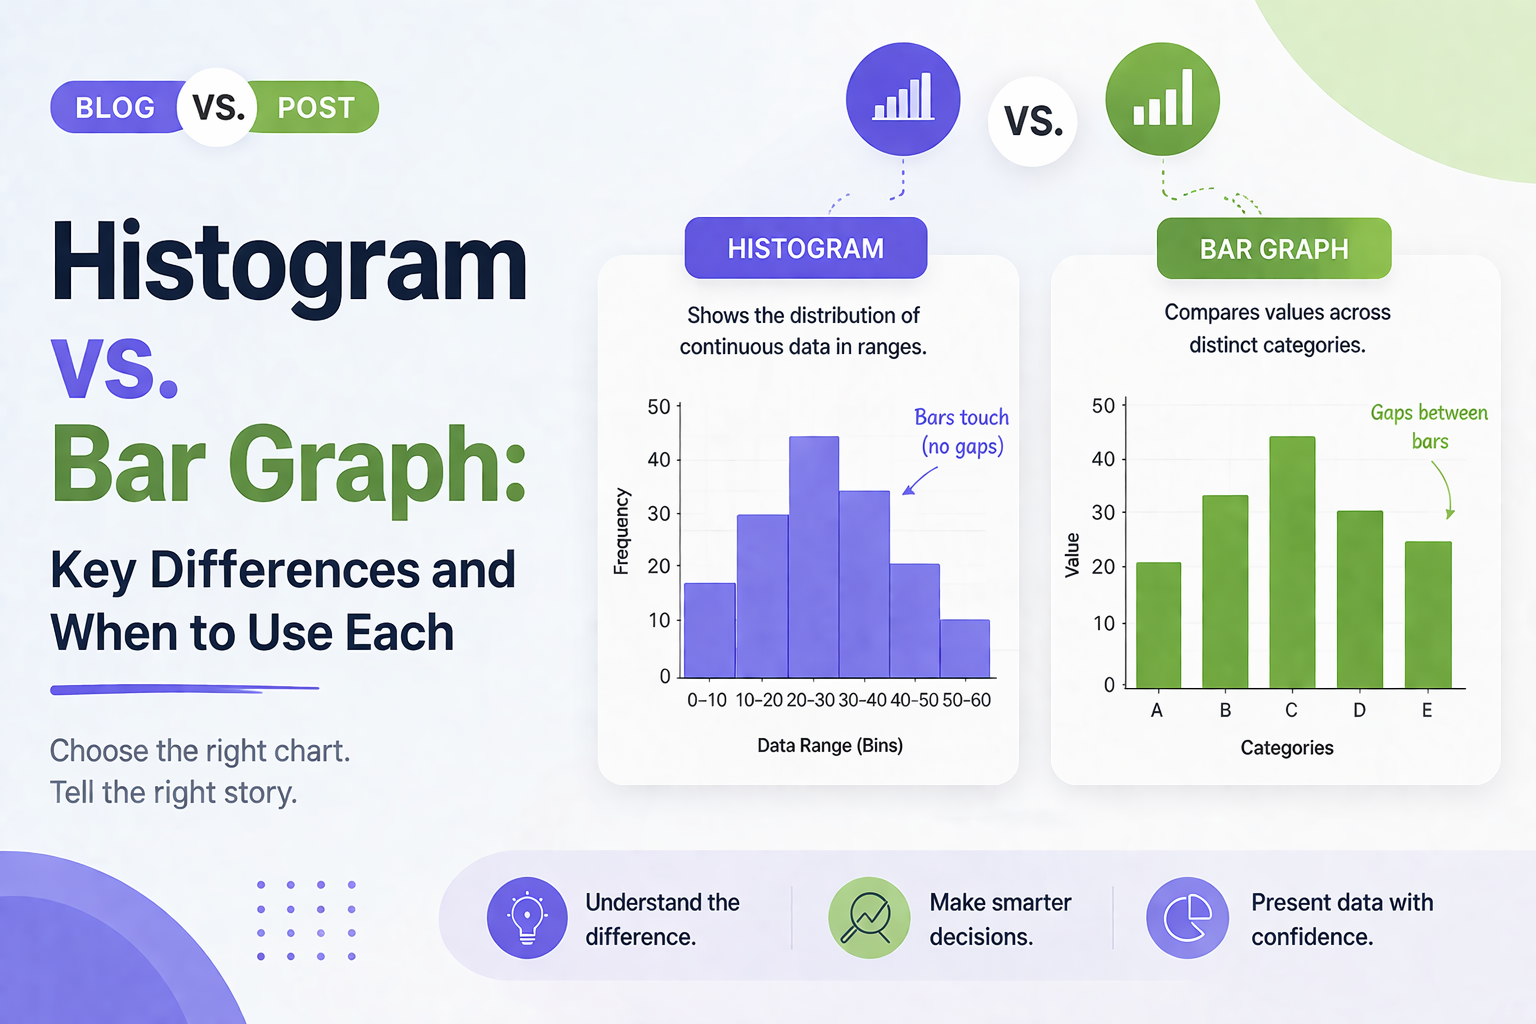
Histogram vs Bar Graph: Key Differences and When to Use Each
Histogram vs Bar Graph You have got data. You need a chart. You open PowerPoint or Google Slides and hover over the chart options. Then it hits you: should this be a histogram or a bar graph? They look almost identical, so it is easy to assume they are interchangeable. But they are not, and…
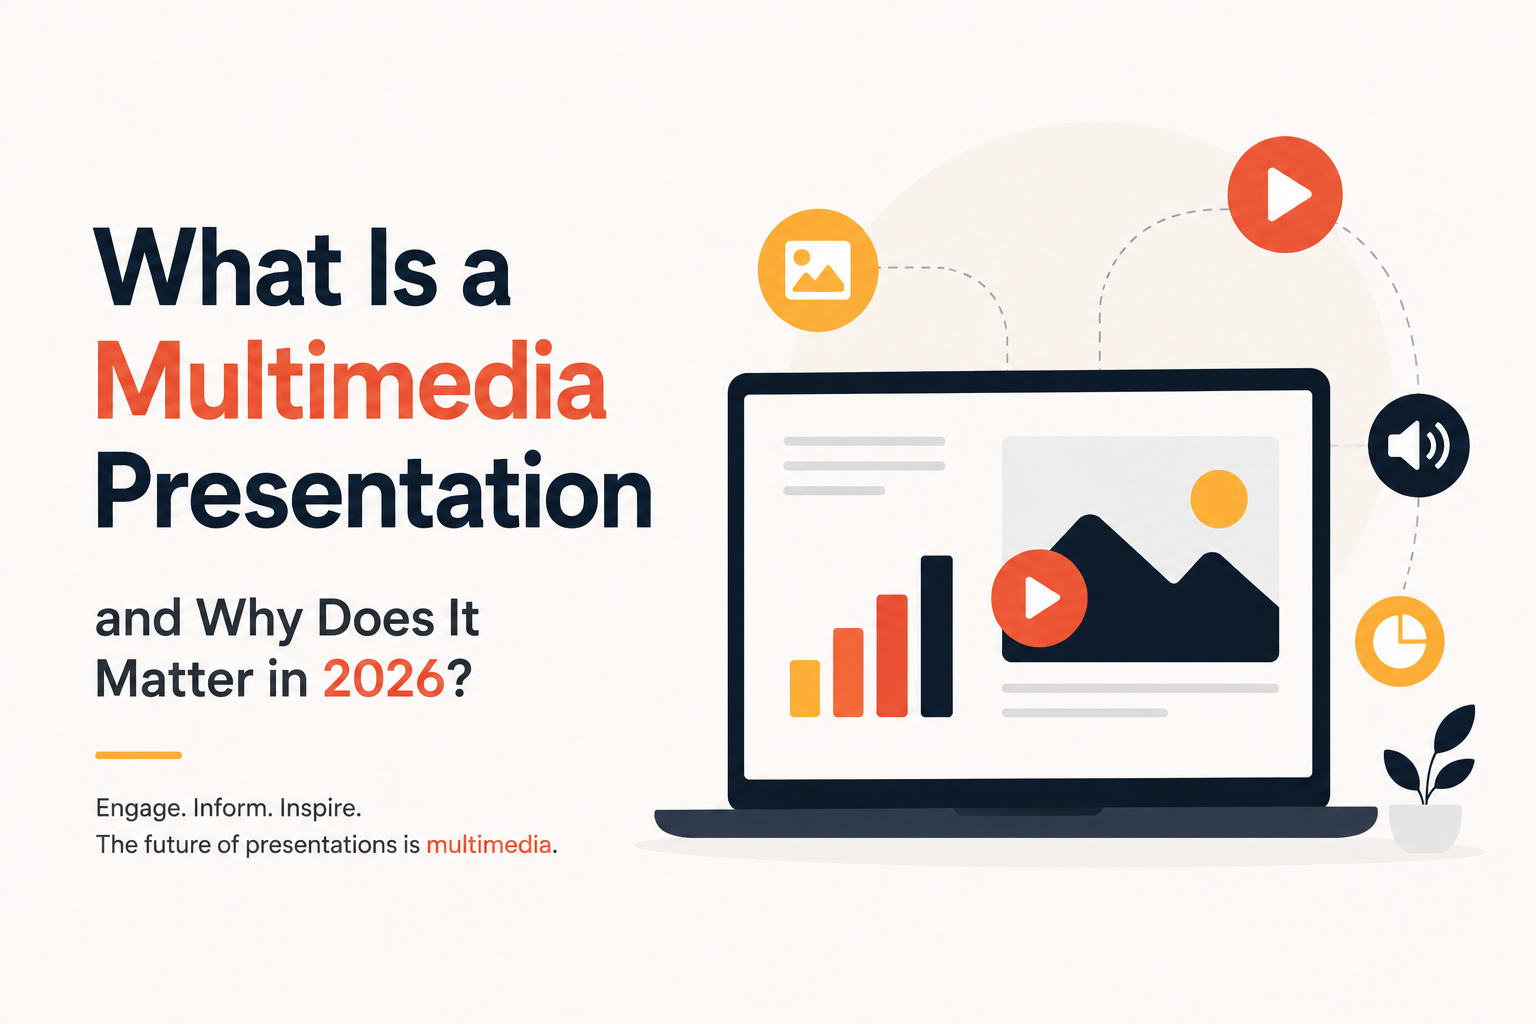
What Is a Multimedia Presentation and Why Does It Matter in 2026?
Picture two slide decks. One is plain text, slide after slide, in the same gray bullet format you’ve seen a hundred times. The other has a short product clip, a clean chart, and a quick voice note from a happy customer. The second one sticks with you days later, and the first one doesn’t. That…
Best Meeting Minutes Templates to Keep Meetings Organized and Actionable
Most teams have sat through a meeting that felt productive in the moment, only to realize a week later that nobody can remember what was actually decided, or who was supposed to do what. The meeting itself wasn’t the problem. The way it was documented was. Good meeting minutes are what turn a conversation into…