
How To Lock an Image in Google Slides for Better Presentations



You’ve spent time arranging a polished slide layout in Google Slides, only to nudge an image by accident and throw everything off. If you’ve been there, you already know why learning how to lock an image in Google Slides is worth a few minutes of your time. SlidesDepot has seen this frustration come up again and again from presenters at every level. Locking images keeps your design intact while you edit text, add data, or collaborate with a team. This guide walks you through every method available and helps you avoid the mistakes that quietly break slide layouts.
Why Locking Images Matters in Google Slides
Google Slides doesn’t have a dedicated “lock” button the way desktop design tools do. But that doesn’t mean you’re stuck working without guardrails. There are several reliable workarounds that achieve the same result, and once you know them, protecting your layout becomes second nature. The most common reason images shift is accidental selection during editing. This happens constantly during collaborative sessions, when multiple people are working on the same deck and not everyone is careful around background visuals or decorative elements. Locking, or at least protecting, those elements saves you from repeated realignment.
Method 1: Use the Master Slide to Lock an Image in Google Slides
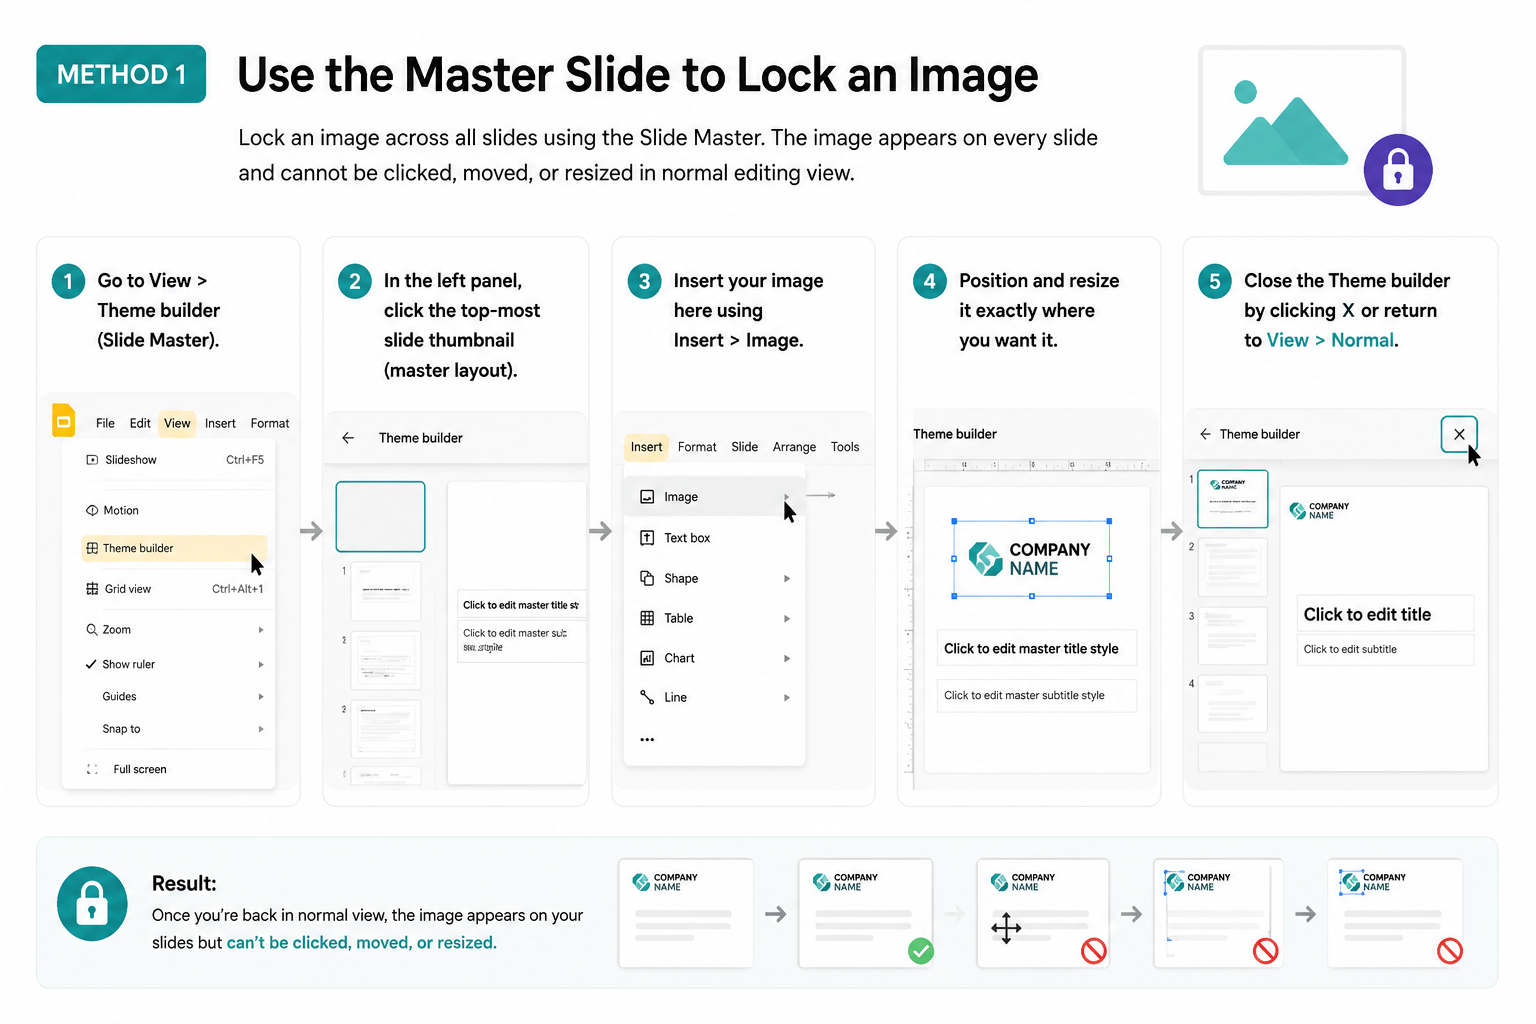
The most effective way to lock an image in Google Slides is to place it on the Slide Master. Anything added to the master appears on every slide that uses that layout and cannot be selected or moved from the normal editing view. Here’s how to do it:
- Open your presentation and go to View > Theme builder (previously called Slide Master).
- In the left panel, click the top-most slide thumbnail, which is the master layout.
- Insert your image here using Insert > Image.
- Position and resize it exactly where you want it.
- Close the Theme builder by clicking X or returning to View > Normal. Once you’re back in normal view, the image appears on your slides but can’t be clicked, moved, or accidentally resized. This is ideal for logos, watermarks, brand backgrounds, or any visual that should remain consistent across the entire deck.
Method 2: Group the Image with a Transparent Shape
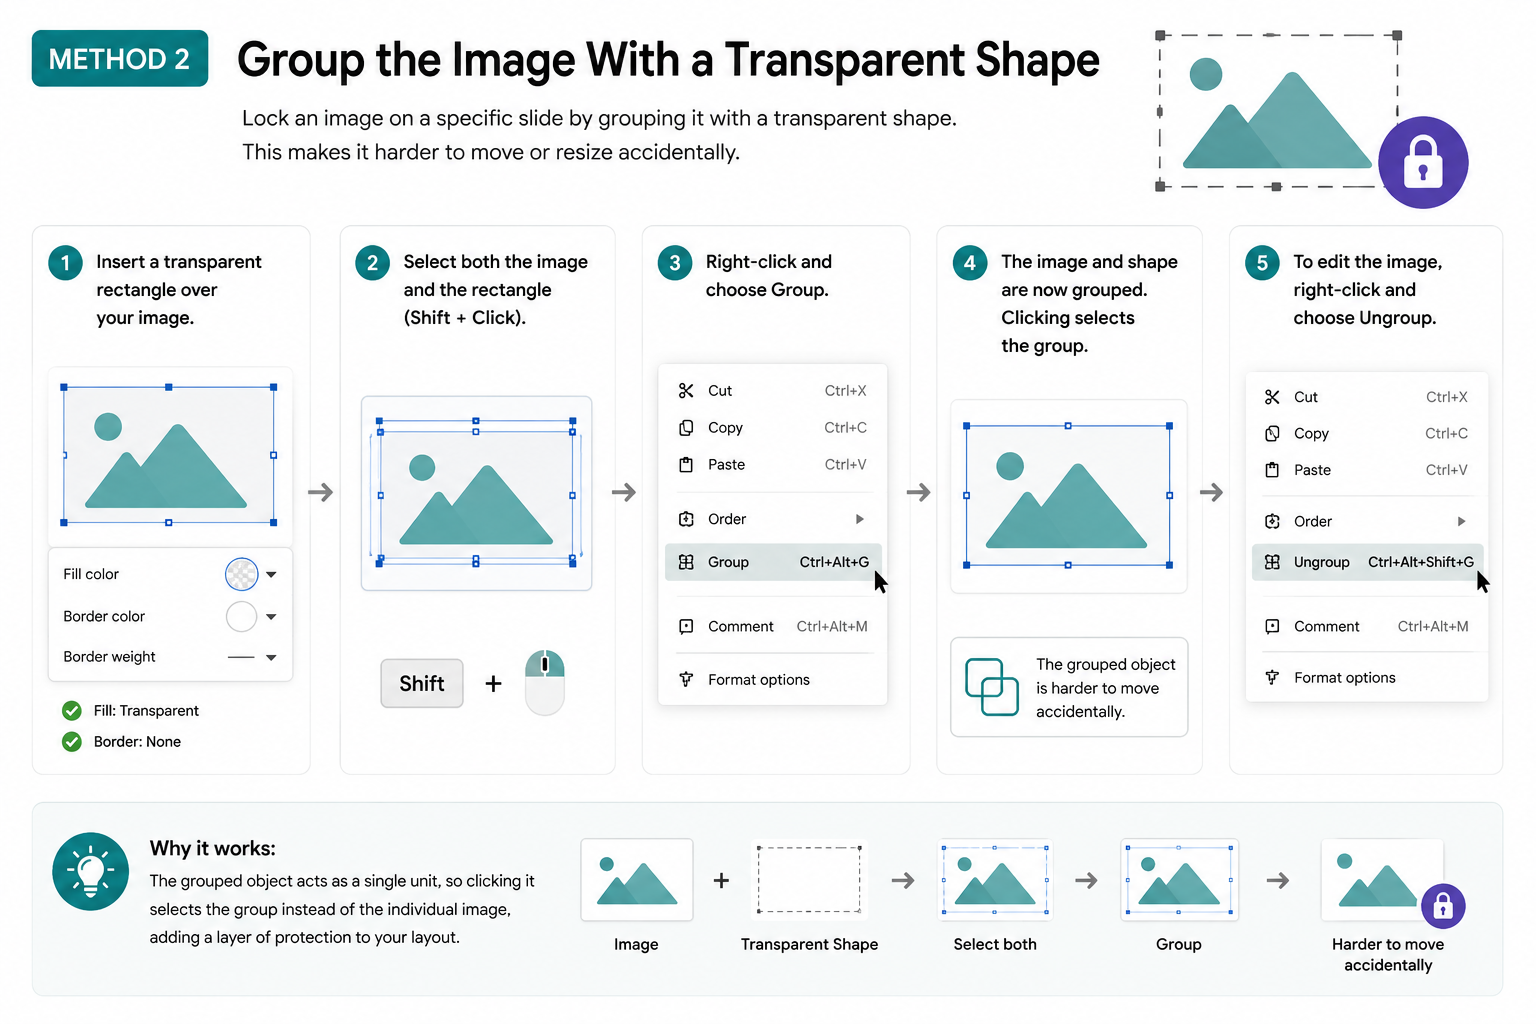
If you want to lock an image within a specific slide rather than across all slides, grouping is a practical solution. Here’s how:
- Insert a transparent rectangle over your image. Set the fill to transparent and the border to none.
- Select both the image and the rectangle by holding Shift and clicking each.
- Right-click and choose Group (or use Ctrl+Alt+G on Windows / Cmd+Option+G on Mac). The grouped object is now harder to accidentally reposition because clicking it selects the group rather than the individual image. While it isn’t a true lock, the extra step of ungrouping adds a friction layer that protects layout integrity during editing.
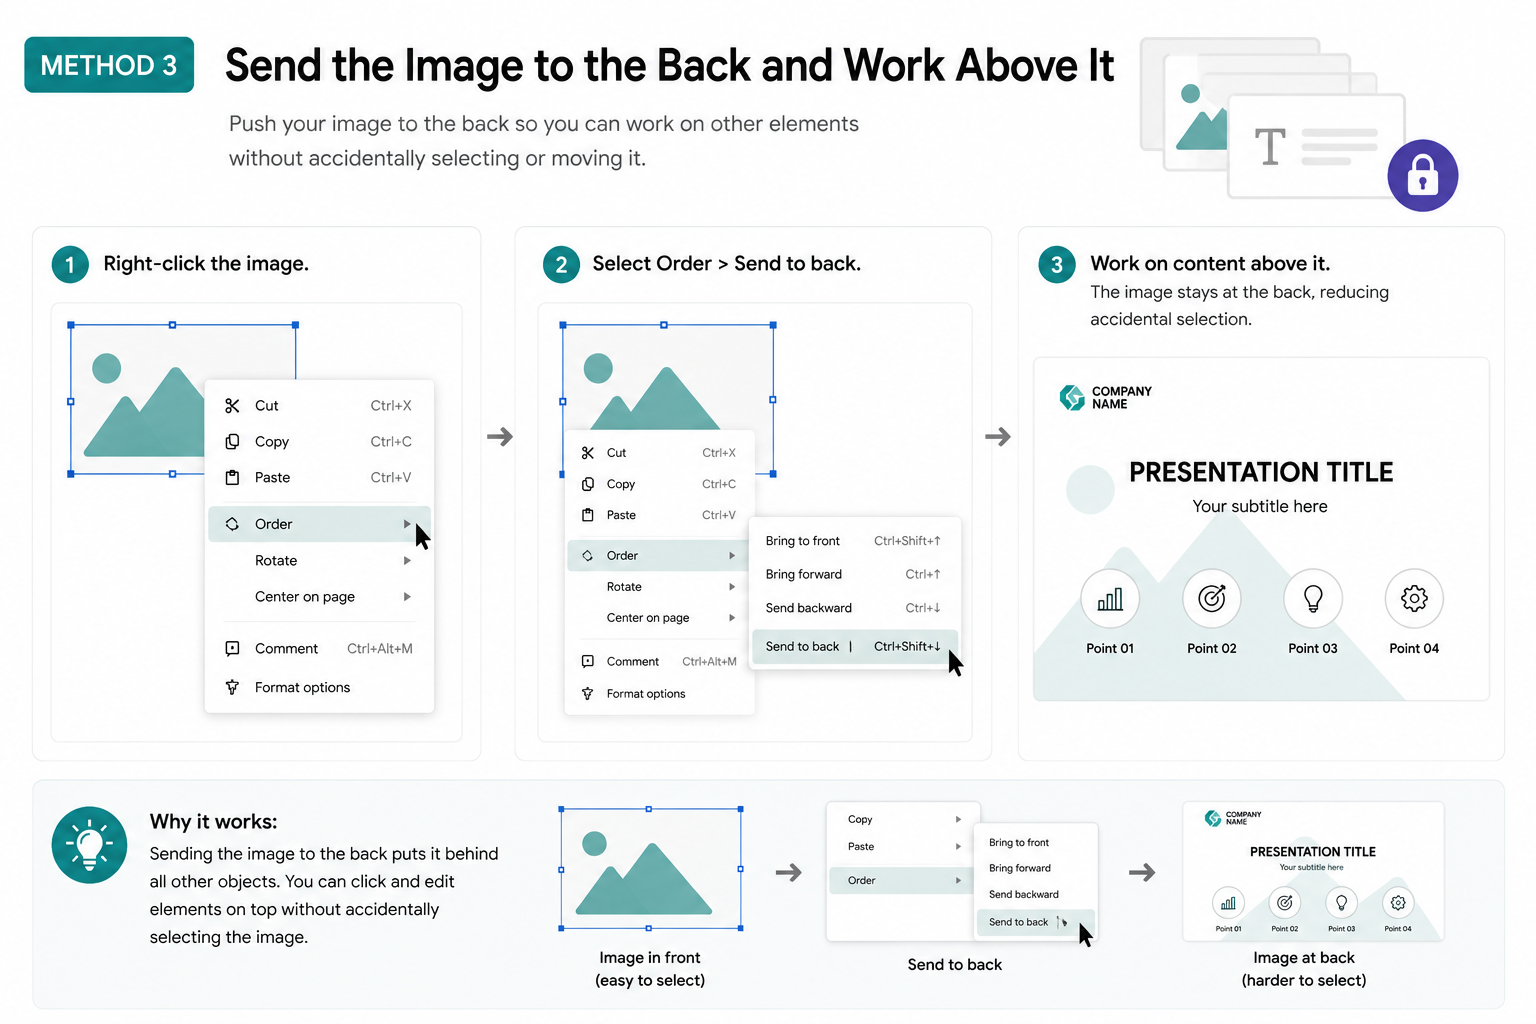
Method 3: Send the Image to the Back and Work Above It
Another approach is to push your image to the back of the layer order so it behaves more like a background element.
- Right-click the image.
- Select Order > Send to back. With the image at the back, clicking anywhere on the slide will select elements above it first. Your image stays in place while you work on text, icons, and other content layered on top. It’s not foolproof, but it significantly reduces accidental selection during fast-paced editing sessions.
Method 4: Use Share Permissions to Protect Your Slide Layout
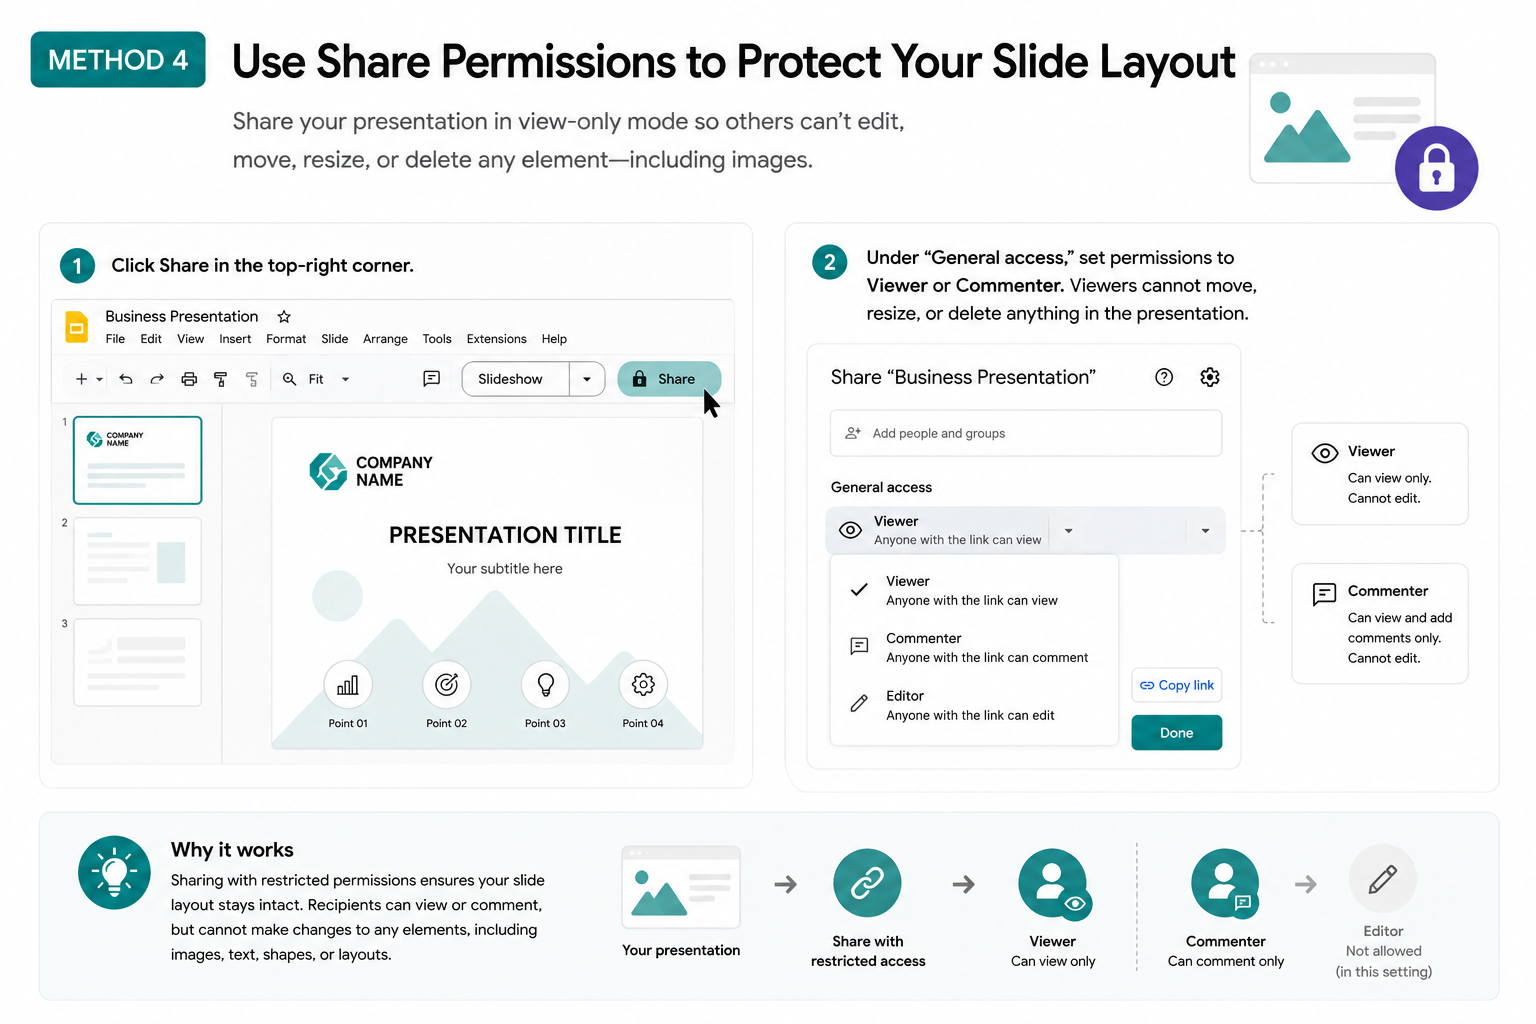
If you’re sharing a presentation and want to prevent others from editing any element, including images, share the file in view-only mode.
- Click Share in the top-right corner.
- Under “General access,” set permissions to Viewer or Commenter. Viewers cannot move, resize, or delete anything in the presentation. This is the cleanest solution when you need to distribute a finalized deck without risking edits to your layout. For internal team use where edits are allowed in some areas but not others, consider duplicating the master with your locked elements and keeping the editable version separate.
How to Lock Images in Google Slides Using Add-ons
Some add-ons in the Google Workspace Marketplace offer expanded control over element protection. These can be useful if you’re managing complex decks with multiple contributors. To explore options:
- Go to Extensions > Add-ons > Get add-ons.
- Search for presentation management or slide protection tools.
- Review permissions carefully before installing anything from a third party. Results vary, and not every add-on delivers what it promises, so check reviews and ratings before committing to any tool.
Common Mistakes That Shift Images Accidentally
Even with protective methods in place, a few habits tend to cause problems. Clicking too quickly near layered elements. When objects overlap, a single click can select an unintended element. Use the Tab key to cycle through objects and select the one you actually want. Using Ctrl+A to select all. This grabs everything on the slide, including images you intended to leave alone. Use selective clicking or group elements intentionally before applying bulk formatting. Forgetting to check the master after theme changes. If you switch themes or layouts, master slide content can shift. Always verify your locked elements after any theme update.
Start With a Template That’s Already Built Right
Sometimes the fastest path to a protected, well-structured layout is starting with a template that was designed with intention from the beginning. If you’re regularly working in Google Slides, browsing Google Slides templates from SlidesDepot gives you designer-crafted layouts where visual hierarchy and image placement are already thought through. You spend less time repositioning elements and more time focused on your content. SlidesDepot’s presentation template library covers everything from single infographic slides to full pitch decks, all built to work natively in both Google Slides and PowerPoint with no conversion needed. The library is updated weekly, so there’s always something fresh to work with whether you’re building a sales deck, an educational presentation, or a business proposal.
Lock Images in Google Slides and Keep Every Layout Intact
Once you know how to lock an image in Google Slides, the process becomes quick and automatic. Use the Slide Master for anything that needs to stay consistent across every slide. Use grouping or back-layer ordering for slide-specific elements. Use share permissions to protect finalized decks from unintended changes. A clean, stable layout isn’t just about aesthetics. It signals that the presentation was built with care, and that attention to detail carries through to how your audience receives the content itself.


How to Make a Bullet Point on Google Slides (Step-by-Step Guide for Beginners)
If you’re searching for how to make a bullet point on Google Slides, you’re likely trying to organize your presentation in a clearer and more professional way. Bullet points are essential for structuring information, improving readability, and keeping your audience focused. Instead of overwhelming viewers with long paragraphs, bullet points allow you to highlight key…

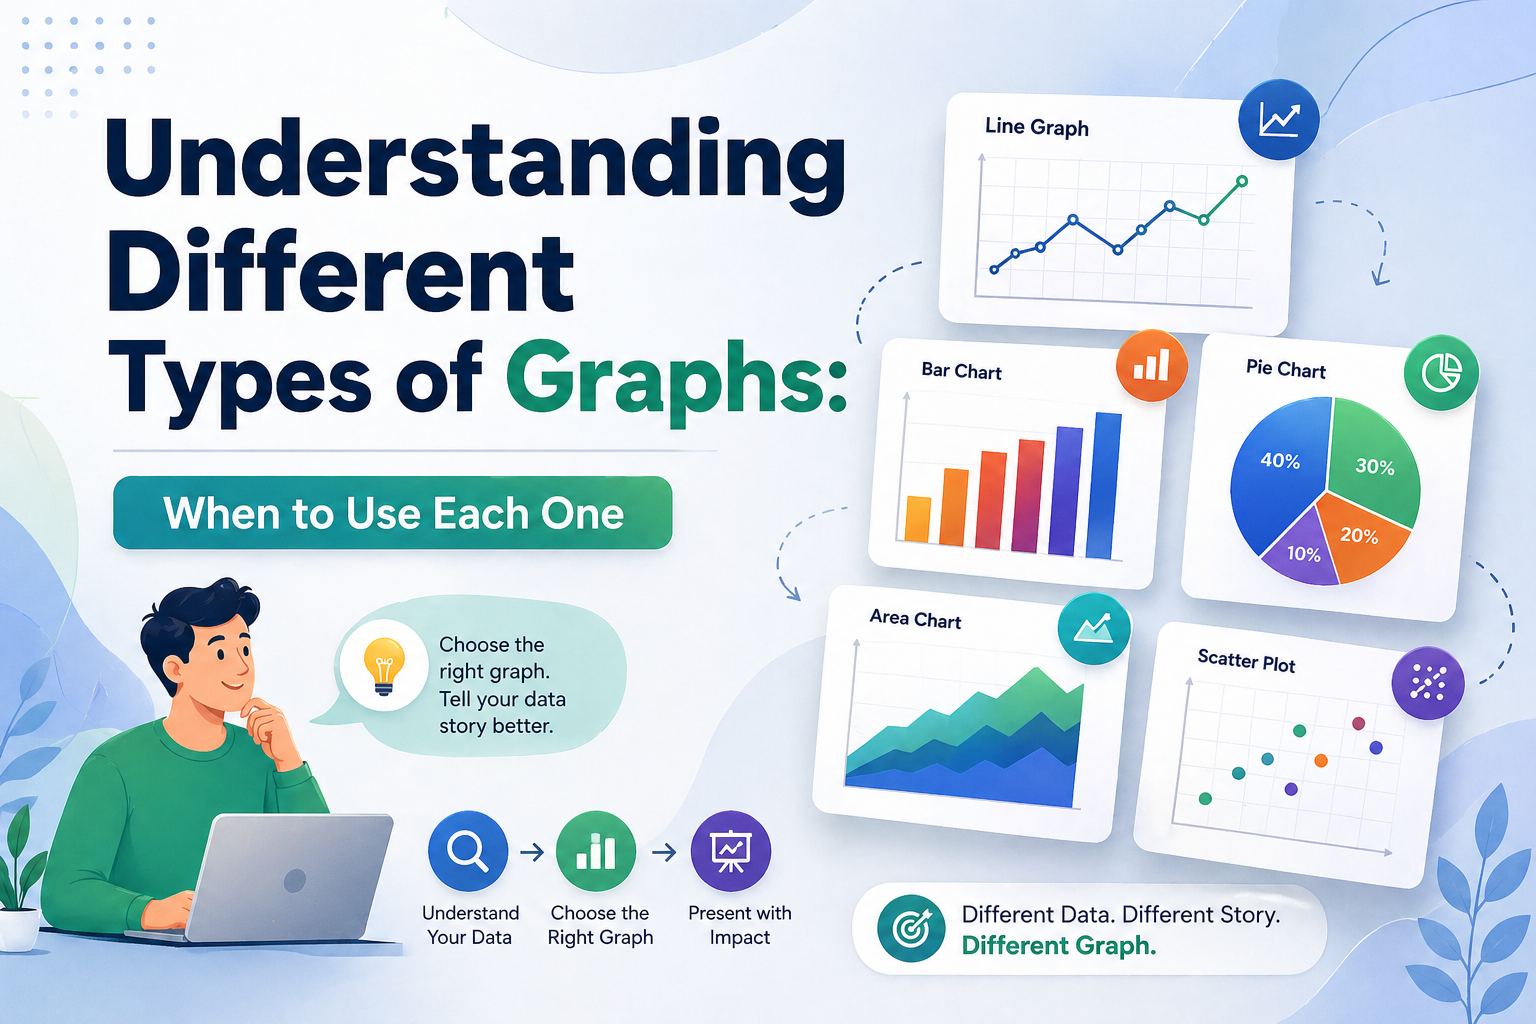
Understanding Different Types of Graphs: When to Use Each One
Data without the right visual is just noise. Whether you are a startup founder walking investors through growth projections or a project manager presenting a quarterly sprint review, the types of graphs you choose will determine whether your audience leans in or tunes out entirely. This guide breaks down every major chart and graph type, explains the…
Google Slides vs PowerPoint Templates: Which Platform Is Right for You in 2026?
Picking the right presentation platform is one of those decisions that shapes how you work every single day. Google Slides and PowerPoint have both evolved significantly, and in 2026 they sit closer to each other in capability than ever before. Yet they still serve different workflows, different team structures, and different priorities. This guide covers…